Fun Shakespeare Activity for Teaching the Use of Space

Most…okay all, of the time when I begin using performance to teach Shakespeare in my classroom, the actors look like they’re playing hacky-sack rather than performing a scene. That is to say, they stand in a circle and read to each other. At first, I don’t mind. I don’t want to burden them with too much too soon. After all, just getting the text can be challenging enough. However, as we move deeper into the play and closer to performance time, I want them to be able to use space and visual images to communicate ideas as well as the language itself.

I begin by showing the Queen Mab scene from the Zeffirelli Romeo and Juliet. I ask students to pay attention to the colors and the use of space by the actors. In particular, where do actors stand in relation to each other and how do these elements change over the course of the scene.

For those who know the scene, it begins with many warm colors: oranges and reds, and Mercutio appears above everyone commanding attention like an actor on stage. Mercutio’s language at the beginning reminds us of Cinderella and the Fairy Godmother with images of a carriage drawn by “a team of little atomies.” As the images grow darker, however, so does the mise-en-scene. Mercutio jumps down from the ledge, seems startled with his own line of “drums in his ears,” then separates himself from the rest of the group. The next shot reveals Mercutio alone and downhill from everyone bathed in blue light, with his words echoing, “This is she…this is she….”

On a basic level, we can talk as a class how the scene moves from bright and orange with Mercutio elevated and surrounded by friends to dark and blue with him lowered and isolated. Thus, the director reinforces the written text with a visual one.

After analyzing this scene, we synthesize one. For this process, we play a game called “Screaming Sculptures.” First, I ask how many dimensions in a given space. While metaphysical answers may vary, the class comes to the agreement that space can be defined through width, length, and height. So, I tell them, in our sculptures, we want to do our best to use as much of that space as possible.

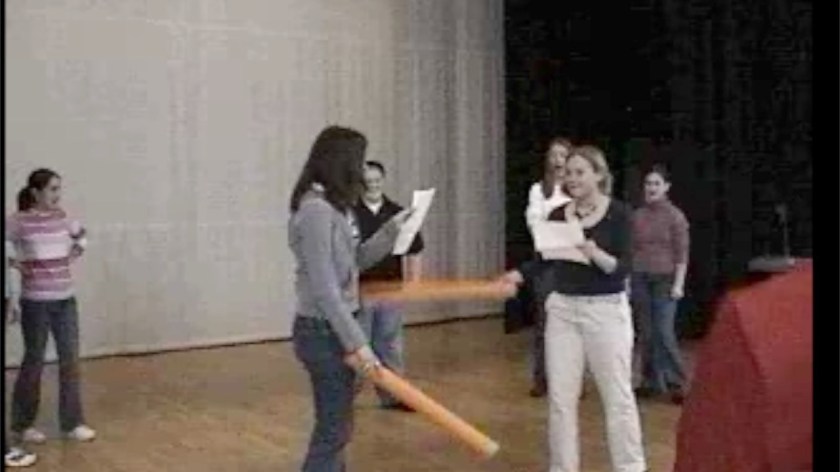
Students form groups of four or five. I will then give each group a scene that they will depict. My favorites include a baseball game, a rock concert, a bank robbery, and a day at the beach. One at a time students scream, (really just to add some more energy!) then run to the performing space, strike a pose, and freeze. The combination of all the poses should depict the scene that the rest of the class will try to guess. In addition, they should attempt to use as much of the space as possible.

Each group establishes an order of appearance…that’s all they can talk about. After the first student screams and strikes a pose, the other students must figure out what the previous students are depicting and build from that scene.

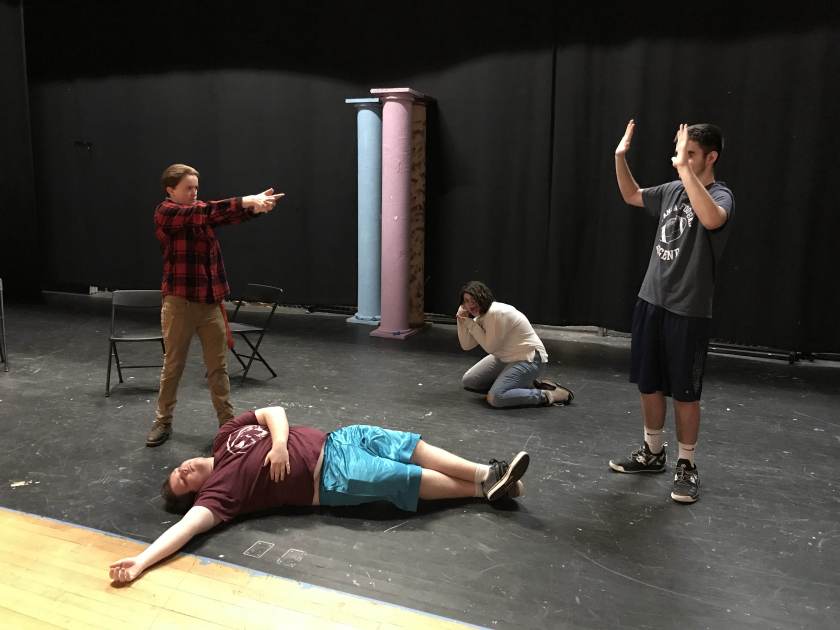
For example, in our bank robbery example above, the first student may strike a pose of a person holding a gun. The second person may run in, then stand in front of the gun with his or her hands in the air. Person number three may see that a length of the space has been covered, but not the height, so he or she may fall flat on the floor like they’ve been shot. Person four may decide that the mid-level space off to the side has not been used, so he or she may kneel behind a desk pretending to call the police.

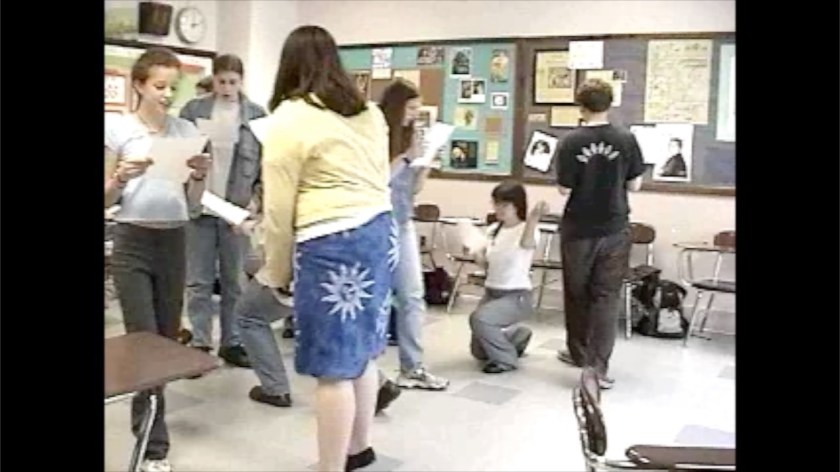
After each group member strikes their pose, I tell the group to stay frozen, then ask the class to guess the scene and also explain each pose. At this point, I tell the sculptures that they may relax a bit, (it can be tough to hold some positions for a long time) but to stay in their general space.

Then, as a class, we critique the art. “How was their use of space lengthwise? Width? Height?” At first, students struggle to know what to do, or how to use the space, so I will offer suggestions. “What if you moved over here? What could you do to use this level?” Many times I ask the class for suggestions. After discussing the tableau, we repeat the process for each group.

I love the question “what could you do to use this level?” It helps generate some stage “business” ideas. I often tell students about a part I played in As You Like It. During rehearsal, I couldn’t really figure out what to do for stage business during the wrestling scene. No one was using the floor level, so I decided that my character would begin a betting pool and start throwing money on the floor. This created an entire subset of activity for the scene. The prop master even had money printed up with the director’s face on it!

To make the activity more complex, I sometimes facilitate “Advanced Placement Screaming Sculptures.” Here I will either give the group a vague scenario that they have to create like, “This is a family reunion portrait. Not everyone is happy to be here. Go.” Then they have to figure out, without talking, how to communicate this idea using the space. It also provides an opportunity to talk about character development. What can we learn about characters by their posture? When students find themselves truly ready for a challenge I simply tell them, “Create a tableau.” Again, without talking, one character strikes a pose and the other group members follow one at a time building from each other to create the sculpture. Then the rest of the class tries to interpret it.

This activity also works well to sort the chaos of large scenes. I remember directing Merry Wives of Windsor and trying to block the last scene. I think every character in the play is in that scene. Maybe even a few from Henry V. It looked like a flash mob. I finally said, “Okay, you’ve got 30 seconds to sculpt this scene…go!” Actors looked at each other, looked at the space, figured out their relationship to each other, and, suddenly, the ending became clear, tidy, and in the words of Scuttle, “an aesthetically pleasing configuration of” actors!

When teaching Shakespeare, incorporating the use of space to underscore the written text with a visual text can help students really see the relationships among the characters. So give it a try and let me know how it goes!

Teaching Shakespeare’s Wordplay in Romeo and Juliet

You have reviewed puns, shown examples, and discussed why they’re funny.  Activate Prior Knowledge? Check! You begin the opening scene to Romeo and Juliet and model raucous laughter at the appropriate (and inappropriate) parts.  And yet the students still look at you like you’ve sniffed too much glue. Then you realize…they’re right.  These old references just aren’t that funny to modern audiences. Throw a couple of pool noodles into the mix, however,  and you can transform archaic language into uproarious comedy.

More Matter, Less Art…

After you’ve done your due diligence by explaining puns, hand out a copy of the Sampson and Gregory in Act 1 Scene 1. (You can download a blank copy here, and a completed one here.)  Tell students to look for similar-looking words that could indicate a pun. They should then circle the punning word and draw an arrow back to the word it puns against.  For example:

I model the first three lines with class; then students work through the rest of the passage with a partner.  After they have identified the puns, we complete a little formative assessment and review their choices. “Back in the day,” as my students love to say, I used this almost-as-archaic-as-the-puns-themselves device known as an overhead projector.  Using a dry erase marker to draw circles and arrows (“And a paragraph on the back explaining what each one was to be used as evidence against us!” Sorry…couldn’t resist.) I explained each line. These days, I usually project my screen and simply highlight the puns as students follow along and make adjustments as necessary.  With a tablet, I’m sure you could upload the text and then use a drawing app as a visual reference for students.

Before getting too deep into this activity, I also consider my audience.  The puns at line 20 become sexual as Sampson and Gregory take bawdy stabs at each other.  Gregory, with stereotypical male swagger, claims that he will “cut off the heads of the maids…Take it in what sense thou wilt.”  Sampson, belittling Gregory’s male equipage, responds, “They must take it in sense that feel it.” Not to be put down, Sampson maintains that  “me they shall feel when I am able to stand.”

It is up to the teacher’s style, community attitude, and student maturity how, or if to deal with this subject matter.  When I workshop this scene with middle schoolers, I cut this part out. Most of my high school students get the jokes themselves when I simply explain that these jokes refer to virginity and “the apparent state and size of a part of male anatomy.”  Attention is usually rapt at this point.

Suit the Action to the Word

Then I pull out the nerf noodles.  Waving them around usually ensures a rapid and enthusiastic mustering of willing participants.  I choose two students to read and tell the rest of the class that they must help act it out. I give the readers the noodles and tell them that whenever they come to a circled word that has an arrow pointed back to the other character’s word, they get to whack them with the noodle  The only two places they can hit them, though, are the shoulder and the hip. (With some high school boys, especially, we’d have to begin concussion protocol if they were allowed to hit each other in the head!) Also, I remind them that they are friends and not enemies. This is a verbal joust for fun, not mortal combat.  (That comes later!)

In order to emphasize the playfulness of the text, I set the scene.  I tell students to imagine that they have just finished lunch and are hanging around waiting until it’s time to go back to class or work.  Sampson and Gregory have started talking and making jokes at each other. At each palpable hit, the audience students must laugh uproariously, even if it isn’t overly funny.  This helps set up not only the mood of the scene but also provides something for Sampson and Gregory to play off. Furthermore, their participation invites engagement from everyone and not just the readers.

Then off we go!  Sometimes I have to encourage more reticent students to increase the enthusiasm of their laughing, but suddenly, dull, boring and archaic language becomes engaging.  Many times, too, Sampson and Gregory start playing to the audience, pausing for dramatic effect, and taking bows. The energy from the audience pushes them to a point where they can simply react as opposed to worry about how to act.

Then we get to the brawl, but that’s a subject for another post….

Our Revels Are Now Ended

After completing the scene I like to discuss its impact.  How did students like the activity? What mood did the scene generate?  Why does Shakespeare open the play like this? Students often present insightful ideas here and debriefing the experience often solidifies the idea that “Hey, this Shakespeare unit might be fun after all!”

Although I love opening Romeo and Juliet with this activity, it can be effective for other Shakespearean word-play situations as well. For example, I often use it for Beatrice and Benedick, in Much Ado, Falstaff in and Hal in Henry IV Part 1, Lorenzo and Lancelot Gobbo in Merchant of Venice or Feste in Twelfth Night.  I love it because of its balance.  The close textual reading requires students to really grapple with sophisticated language, however, they discover the rewards in a fun, engaging, visceral and visual experience to truly solidify their learning.


So break out those pool noodles!  By beginning the Romeo and Juliet unit with a “15 Minute” play activity, then further engage them with the wordplay of this scene, your students will come to class the next day and excitedly ask, “Are we doing Shakespeare today?”

3 Dynamic Strategies for Teaching Shakespeare’s Language

If you’ve never seen comedian John Branyan’s “Three Little Pigs” Shakespeare style, go watch it now.  It’s hilarious. I’ll wait.

Still laughing?  (I loved it so much I memorized it as a monologue.)  But he’s right: Shakespeare used over 30,000 words in his writing.  While researchers suggest that modern audiences use more than the 3000 words suggested by Branyan, many teachers can identify with his line “‘What light through yonder window…’ What?  Does this come on a DVD?”

In order to convince students that Shakespeare can be fun, we must first show them that the language can be accessible.  (Hey, a significant portion of Shakespeare’s original audience couldn’t even read!)

I use variations of the following activities to accomplish simple goals.  First, I want to foster familiarity. In other words, provide enough repetitions in speaking and listening so that the language starts to hear and feel “normal.”  Second, I want to build voice skills of accurately reproducing the phonetic sounds as well as the proper phrasing. And I want to do this in ways that engage all students.

The structure of the Language

Students are not used to reading text in verse format.  Thus, the inevitable pauses they place at the end of every line, needed or not, distort the rhythm and parsing of meaning.  To help them, I use an activity called “Text Surfing.”

I say a sentence containing a list separated by commas.  Something like, “This weekend I’m going on a canoe trip so I need to remember my paddle, my PFD, my canoe, and my splash gear.”  Then I ask the students: when I finished saying “paddle,” how did you know that I wasn’t done my list? After several smart-alecky answers, we get to the truth of that matter that my voice inflection stays high, whereas, after “splash gear,” my voice inflection goes down.  

Then I write the sentence on the board and illustrate my rising inflection by making a swooping motion up with my hand at each comma.  I direct the students to follow along with me.

After introducing the concept I break out the Shakespeare text.  I tell students to read it while paying attention to the punctuation.  At everything except a period or exclamation point, they should raise the inflection of their voice and, for emphasis, make the swooping motion with their hand.  I will sometimes pair them up and have them switch at every complete sentence if I feel they need some social interaction. I have them read for five minutes or so, circulating around the room and reminding them to “keep swooping!”

I tell them not to worry about meaning at all.  In fact, I don’t care if they “understand a single word!”  I simply want them to pay attention to the phrasing.

I like this activity for its simplicity.  Rather than overwhelming students with complex meanings early in the unit, I focus on building success and familiarity one phrase at a time.

I call the second activity “Traveling Passage.”  Similar to “Text Surfing” this activity focuses on the phrasing of the language.  It adds, however, another layer of complexity. In addition, I like it because I can add movement.  In this activity, I ask students to walk around the room while reading a selection of text. (Verse works better than prose.)  When they come to a comma, change direction. When they come to a period, stop. When they come to an exclamation point, jump. When they come to a question mark, kneel.  When they come to a semicolon or colon, shuffle their feet.

This can become a bit chaotic especially with a larger class in a small space.  Embrace the chaos! The point is not to think about the theological ramifications of killing Claudius while he prays but rather to increase familiarity with the language and, hopefully, teach neophyte Shakespeareans not to stop at the end of every line.  Understanding the nuances of meaning will come later!

Sometimes I find reducing Shakespeare to the ridiculous provides a wonderful catalyst for shattering student illusions that studying Shakespeare should be reverential and plodding.  The language concept of inversion often contributes to this notion. Placing the subject and verb at the end of the sentence just sounds weird. Until you justify it by saying that Yoda does it all the time.  For example, “When nine hundred years old you reach, look as good you will not.”  If I have several Star Wars fans in class, I ask them to quote their favorite Yoda lines with inversion.  

Then comes “Inversion Improv!” I ask for three students volunteers.  I give them a situation like, “You’re on your way to a concert but got a flat tire,” and two minutes to improvise a scene where they introduce and solve the problem…while speaking in inversion the entire time.  While it can be a challenge for some students, this activity has a huge upside: it’s funny, it’s dynamic and interactive, and it provides an opportunity to illustrate a component fo Shakespeare’s language and make it more understandable.

Language study does not have to be boring.  In fact, it definitely shouldn’t be early in the unit.  We can get more in-depth as we progress through the play.  However, by using these hands-on, kinesthetic, and auditory activities, teachers can provide the scaffolding for more complex learning.

Designing Shakespeare Lesson Plans

-Ted Tibbetts

The daunting task of designing an entire unit of Shakespeare lessons can feel like, well….Exit,  pursued by a bear.  While these units hold so much potential, helping students over the Elizabethan language barrier can be tough.  So tough, in fact, it can be tempting to “do you any embassage to the Pigmies, rather than” attempt to convince students that Shakespeare can be fun.  By planning a series of progressive skill building activities, however, you will find that students will clamor for more! Really.

Shakespeare Units:  Backwards Design

When designing Shakespeare units, consider “Backwards Design” if you are a Marzano follower, or “keeping the end in mind” if you are a Covey acolyte. Some teachers may want to emphasize literacy, essential questions, or cultural allusions.  As I have discussed before, I prefer to focus on the performance.  The process fosters teamwork (“I don’t want to play Juliet, you play Juliet-No I don’t want to play Juliet-okay, fine, I’ll play Juliet), and resiliency, (“Gulp, there’s an audience out there”).  I find that textual and cultural literacy will occur de facto, though I usually include few activities to ensure that happens. However, when considering the big picture of what I want my students to know or be able to do: perform a Shakespeare scene.   I consider this the third and final phase of the unit.

To get to phase three, we must deliberately plan phase two.  (For you Monty Python fans, five is “right out.”) . How do I teach students the skills necessary to perform a scene?  For English class students, many who have 1) never acted before and 2) are initially terrified of the process, I like to keep it relatively simple.  Clearly, they need to understand what the words mean and how they feel about what they are saying. They need to be able to “speak the speech…trippingly on the tongue” so it doesn’t sound like a drunken cowboy at a hootenanny.  (No offense to you drunken cowboys out there.) They also need to know how to use space to communicate ideas so they’re not either standing in a line or a circle oblivious to the audience. Finally, they should know how to depict a character.  

Phases of Shakespeare Lesson Planning

BUT, before we can get to any of the skill development, we have to plan phase one.  In many pedagogical circles, educators emphasize the need to clarify misconceptions.  Most importantly, as Shakespeare teachers, we must change the student paradigm that Shakespeare is a boring, pompous dead white guy impossible to understand.  Or, in other words, eliminate “Shakesfeare.” (I usually begin this process by telling them that many of Shakespeare’s original audience couldn’t read and that there or more sex jokes in the opening of Romeo and Juliet then in an entire episode of Game of Thrones.)  Consequently, many of my phase one activities are purposefully upbeat, relatively easy, and, often, as silly as possible.  Making these warm-ups and introductory activities energetic gradually fosters familiarity with the language and hopefully sends the message that, “Hey, this is kind of fun.  Maybe I won’t be eviscerated doing this.” When students come to class and begin asking hopefully, “Are we doing Shakespeare today?” then you know you’ve accomplished the mission.

Time for Shakespeare

We also face the thorny issue of time.  Already pressed for time as a result of this standardized testing day, that professional development day, or, in the North, the inevitably ill-timed snow day, our classroom time disappears faster than happy hour on Friday.  And, for sure, using performance strategies to teach Shakespeare takes time. This is why: I assign almost no homework for this unit. Other than activities at the end of the unit to prepare for scene work, I do it all in class.  In my humble opinion, assigning Shakespeare reading for homework constitutes a recipe for disaster. My entire approach is predicated on the philosophy that Shakespeare should be seen and experienced, not merely read. However, this approach takes time, and curricular demands often necessitate covering more content.  

Thus, I solve this problem by assigning less complicated text…a choice book perhaps, or, in the case of a 9th-grade classroom, The Pearl.  In addition, lately, I have been experimenting with faux online class structures.  As online education becomes more and more popular, (many of our juniors and seniors take online college classes in high school), I want students to be familiar with the process.  Moreover, as a Google Classroom school, it is easy for me to post materials, assignments, and discussion questions online. I check in with students in class each day about this unit to answer any questions, but, for the most part, students complete this work on their own and we can focus on Shakespeare in class.

In addition, I save time by cutting the play.  Bryn Allison in her article “How to Teach Shakespeare so Your Students Won’t Hate It” suggests both omitting entire scenes and performing parts of others. I find this highly effective.  Rather than forcing students to muddle through long passages of archaic references, I streamline scenes to be more time efficient. I often post or print cut google doc versions for class.  (If you think you’d like versions of these scenes, leave a comment below and I’ll add posting them to my project list!)

Lesson Planning

Students work the opening of Romeo and Juliet

Many learning situations, especially activities like music and sports, follow a progression.  First comes the warm-up, then skill building followed by the application of the skills in drills, and finally,  the performance or game. I like to follow a similar daily progression. I choose a warm-up appropriate to the needs of the students and the content of the day.  For example, if students need to develop more reading fluency, I’ll choose a text activity. If their speech sounds like a garbled mess I’ll choose a voice activity like “Silly Sounds.”  If the scene for the day provides opportunities for complex blocking, then we’ll do a space activity. I often consider the warm-up to be a skill builder as well, so we often progress right to the scene(s) of the day.  As mentioned earlier, most of my phase one activities focus on building familiarity. In fact, I often tell students, “Don’t understand any of it; I’ll explain it later!” so they don’t get bogged down. Once students begin to read more fluently and have overcome some of their anxiety about the text, I facilitate more skill-building activities like “Dropping In,” “Find the Breaks,” or “Embedded Stage Directions.”    (Look for upcoming posts on all these activities!)

After warm-ups/skill building, we run the scene.  For phase one and the beginning of phase 2, we do it all together.  I either ask for volunteers for the parts or “highly encourage” students to take on various roles.  Usually I also “set the scene” by explaining generally what happens in the upcoming scene and how the characters feel about what’s going on.

Students then read through the parts on their feet, acting as much as possible, and I play the role of director suggesting ways to deliver the line.  For example, I may ask them, “How do you think the character feels about what you just said?” When they answer I say, “Okay, say it like you mean it.”  Or, I may suggest, “Okay, you really want her attention right? And she’s not so sure she wants it, so…each time to say a line take a step closer. And you, every time you say a line, take a step away.”   I’ll even sometimes have a student deliver a line two or three ways and ask them which one they like best.

For longer scenes, I will find natural breakpoints and recast with different students to get more people involved.  About midway through phase two, I’ll break the scene into parts, and assign a group of students to cast, read, and briefly rehearse their section, then bring the whole class together in a scene jigsaw where each group performs their part of the scene. Not only does this approach get everyone involved but it also prepares them for scene rehearsal.

Shakespeare Assessment

A scene from Merry Wives


I plan on putting together an entirely separate post on assessment; however, I will touch on it here.  Essentially, I tell students to decide what character or scene they would like to perform, or with whom would they prefer to work.  I give them a performance rubric (the rubric addresses the Reading Literature and Speaking and Listening Standards) and a week and a half and…go! I ask them to create basic costumes, obtain necessary props, memorize lines, and rehearse the scene. I try to schedule time in the theater so we have a bigger space in which to work.  

During the phase, I also give small assignments that help them prepare.  I facilitate a memorization tricks workshop. I ask them to “translate” their individual lines into their own language and submit it.  I also have them submit “Intention Notes,” and I give them memorization quizzes for blocks of lines. Many students still feel nervous at this point, so I tell them that if they complete all these assignments to the best of their ability, I guarantee success no matter what the outcome of the performance.

Conclusion

Like most fears, the reluctance to study Shakespeare stems from the unknown. Confidence, on the other hand, comes from accomplishing challenging but manageable tasks.  People don’t often get up from the couch and run a marathon. By sequencing lessons and activities in ways that foster confidence and skill building, teachers can help create Shakespeare enthusiasts from their students.

Please feel free to post questions and comments below!

Silly Sounds: Teaching Shakespeare Voice and Language

Many students initially object to Shakespeare because it sounds funny.  But funny in a bad way. Like, “hmmm, this milk smells funny.” This activity spins funny in a good way.  Like, “that scene from Comedy of Errors sure was funny!”  By using a non-traditional and non-serious approach to the text we can demystify Shakespeare, improve students’ diction, and increase their familiarity with the language.

A Brief Stint into Pedagogical Theory

Before we delve into the activity, we should discuss some pedagogical theory. ( Don’t worry, this won’t be as long and boring as a faculty meeting.)  Learning needs to happen through repetition. However, when repetition gets boring our brains check out so although we think we’re getting repetitions we’re really just wondering what we’ll do when Game of Thrones ends.  Thus, most efficient learning comes when we can engage in experiences similar enough to facilitate learning BUT varied enough to keep in fresh.  (Unlike the funny smelling milk.) That’s one of the reasons I love this activity.

Speak the Speech

All that you need for this activity is some text, a sense of adventure and trusting nature.  Essentially, students will read a text in a variety of ways. I usually place them in pairs and have them switch of reading when they come to a “major punctuation mark” like the end of a sentence, a colon or semi-colon.  That way they can get a bit of a break and, also, listen to someone else reading.

For all of these directions, I usually explain them briefly, then immediately say “Off you go,” then start modeling the directions myself.

First, I tell them to read while waving their hands in “dramatic flourishes.”  This does nothing to improve their reading but it increases the energy. I also have an unscientifically proven theory that this makes them feel more like real Shakespearean actors.  

Next, I tell them to pronounce ONLY the consonant sounds.  After I remind them what a consonant is, I model a line. For example, the line “This thing of darkness I acknowledge mine” would sound like “Thsthngfdrknsscknldgmn.”  It’s like Pig Latin but more chaotic.

Then, you guessed it…vowels.  This gets even sillier. “I have of late but wherefore I know not” sounds like,” I-a-o-a-u-e-o-io-o.”  

After vowels I usually have students vacillate through their vocal range.  The begin a line talking really low like Darth Vader and gradually, over the course of the line talk in a high voice like Michael Jackson, then back down again.

Then I get really crazy.  Sometimes I have them sing…opera, rap, country twang.  Then in an “outrageous accent. Really OUTRAGEOUS.” Some students become a bit hesitant here, but others leap right into it.  There’s usually quite a bit of giggling going on at this point. From the students, too. If so, I know the activity has been a success.

I always end with a whisper.  But I tell them “not to lose a single sound.”  This variation fosters precision in their articulation.  It also helps to restore a bit of order and focus. Chaos can be great but needs to be reigned in before we can shift our focus to scene work.

At the beginning of a Shakespeare unit, I do this activity as a warm up about twice a week.  I see a dramatic improvement in the fluidity of their reading and the clarity of their diction.  Give it a try and be sure to send me a recording of the outrageous accents!

https://youtu.be/5gmXKl4FwCk

Check out some student examples!